We’re committed! (Or maybe should be!)

November 25th has marked the next major milestone in our planning saga. A back and forth with the architect over the family room roof has yielded a seemingly workable solution.

I’m told the pitched roof will not result in an oddity on the inside ceiling. (Fingers crossed, I’ll only remain truly convinced once it’s built). To avoid faffing around with the upstairs bedroom window we have a ‘characterful’ ‘dip’ in the roof just be the bedroom window.

SideRear-SubmittedSo this is it. Now the waiting game begins once again. We’ve got a holiday booked over the new-years period and hopefully all being well, we’ll come home to a decision from he council. Fingers crossed!

Planning Planning Planning..

Wow – this planning malarky is really dragging on much longer than even I expected.

I’ve been on to the builders, the local planning department and the civic society and I think fundamentally we’ve settled on the principals of an extension.

SS R6


It would seem to make sense to attach a new garage rather than our previous detached suggestion and to extend upstairs above it. This would give us both a decent sized garage and the en-suite to the master bedroom. A “simple” single storey extension can then be tacked on the back of the kitchen to make things a bit bigger and to sort out the utility.

Our Architect concurred the scheme would work, although wasn’t too impressed with my suggested roof lines, preferring instead a gable end which I duely mocked up as well..

SS R7


This raises the interesting question, of how much separation is required between houses on the 2nd storey? Ideally, the bigger the 2nd storey extension the better for us since it would turn a pokey en-suite into a grand dressing room/bathroom. Further mockups on my part which I’ve emailed to Havering planning, so we’ll see what their views are on the below..

2nd Storey Width

Whilst all this is being contemplated, the ‘simple’ extension to the kitchen is also turning out not to be quite so simple.

Rear R7


Slightly controversially, we’ve decided it would be better to have the doors from the kitchen into the garden on the side wall (facing the dining room) rather than on the rear wall. To try and break up what would be an otherwise featureless end to the kitchen, I’ve proposed putting a matching bay on the back. The above diagram was my naive sketch of how this might work, but the Architect was again not impressed.

Rear R7-Jackie

I’ve commited another crime against design allegedly with my flat roof over the proposed bay, so the Architect has come back with the above suggestion of a pitched roof to allow the bay to have it’s own roof of it’s own to match that on the back of the dining room.

..only the trouble with this is (and, to be fair with my original design too), is that I don’t think this will actually work inside the house. Having a sloping roof on the extension I think is going to cause havoc with the ceiling heights internally.

We’ve spent the last few days racking our brains over this conundrum, and the only suggestion I’ve managed to come up with so far is the monstrosity below.

Rear R8a


I wonder if the bay has to bite the dust and we’ll have to go for a flat back instead. More emails to the architect tomorrow I think unless you, dear reader, have any suggestions? Answers on a postcard please!

Feels like Christmas

Parcel from Derbyshire

Parcel from Derbyshire


I got home from work today today to find 2 boxes waiting for me which had been delivered from Derbyshire. This could only mean 1 thing.. The door furniture is back!


Open Parcel


With all the eagerness of a small child at christmas, I began to unwrap..


…and voila! After a 6 month wait, from this:

Original Lock


..to this..


Restored Locks


How excited am I!? I’ve since managed to find out that I think the locks were originally ‘Berlin Blacked’, but the new powder coating with brass workings seems to look a real treat to me.  Just have to fit them all back to the doors now and to figure out what to do with the doors themselves…

An interesting discovery

Well well well.. another twist and turn in the story of Render..

Whilst perusing rightmove, I came across a local ‘exhibition’ house which has been extended and altered by the new owners. Giving into curiosity, I thought I’d have a look through the original exhibition catalogue to see exactly what they’d done. Flicking past the “Balgores Lane” section – I noticed..

…which seems to suggest the other houses built around the time of ours were all cement roughcast rendered. Indeed some even mention “hollow walls”. I’d always taken it on the value of our original survey that we had solid walls – but now I wonder.

Since all the brickwork is covered with Render, I was suspecting I was going to have to drill a hole to figure out whether we really could have cavity walls. Then I had a moment of inspiration..

BrickworkTaking a photo of the front wall above the porch seems to suggest that all the bricks are facing the same way. If I’m not mistaken, I’m pretty sure this means we do in-fact have cavity walls!

So – sounds like cement render is back on the cards – and maybe roughcast rather than smooth? Back to planning then..


A shed load of ideas…

Since our planning application was rejected, we’ve started questioning other aspects of the plans which were, at least in planning terms, acceptable. A weekend spent with my parents has called into question our thoughts for a new garage.

Garage R1 SS

We had originally proposed to build a new detached single garage between us and next door to match the style of one of the sister houses further down the road.

One controversial alternative, is to bring the new garage forward slightly and to extend the current porch right the way across..

Garage R2 SS

I’m not sure how this would actually look in practice, either from the front or on the side. Also, I’m in 2 minds as to whether having a ‘porch’ in front of a garage is odd..

The third option is to attach the garage to the side of the house, slightly further back and to mirror the porch roof. The thinking being that if ever future planning restrictions were relaxed, we may have the opportunity to build on top.

Garage R3 SS

Think I’ll drop the builders a line to see if we can at least rule any out on cost grounds.

Feeling withdrawn…

So today was D day on the planning application and sadly, we’ve been advised to withdraw by the council.

We had been hoping to build a modest 2 storey extension to the rear and side, however our proposals are evidently unneighbourly.

Unneighbourly

“Unneighbourly”

Evidently any form of 2 storey extension on the left hand side is going to be a non-starter which puts us back to the drawing board. The architects we spoke to and the local planner indicated it’s unlikely that we would be allowed to do any form of 2 storey extension on the right hand side, so we’re left with the option of single storey extensions to the sides or a double storey to the rear.

Of course the bigger question of whether to extend at all still remains open. We were hoping to enlarge the kitchen slightly and to get an en-suite in to any upstairs bedroom. These are our current floor plans:

Oakleigh Floor Plans

Any suggestions? 🙂

More on the “R” Question..

The question of exactly how best to re-render the house still remains open, but further research and information is upon us.

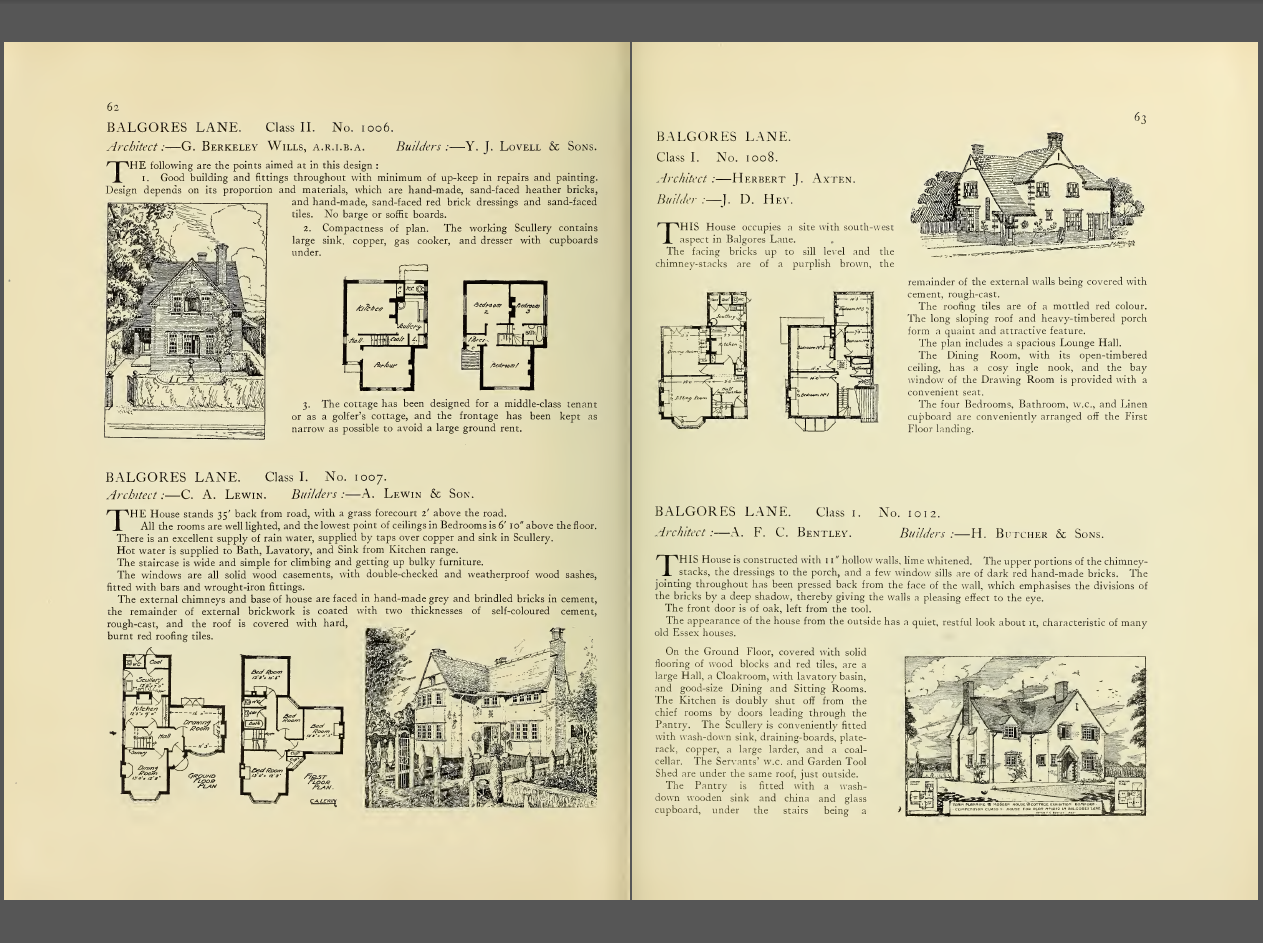
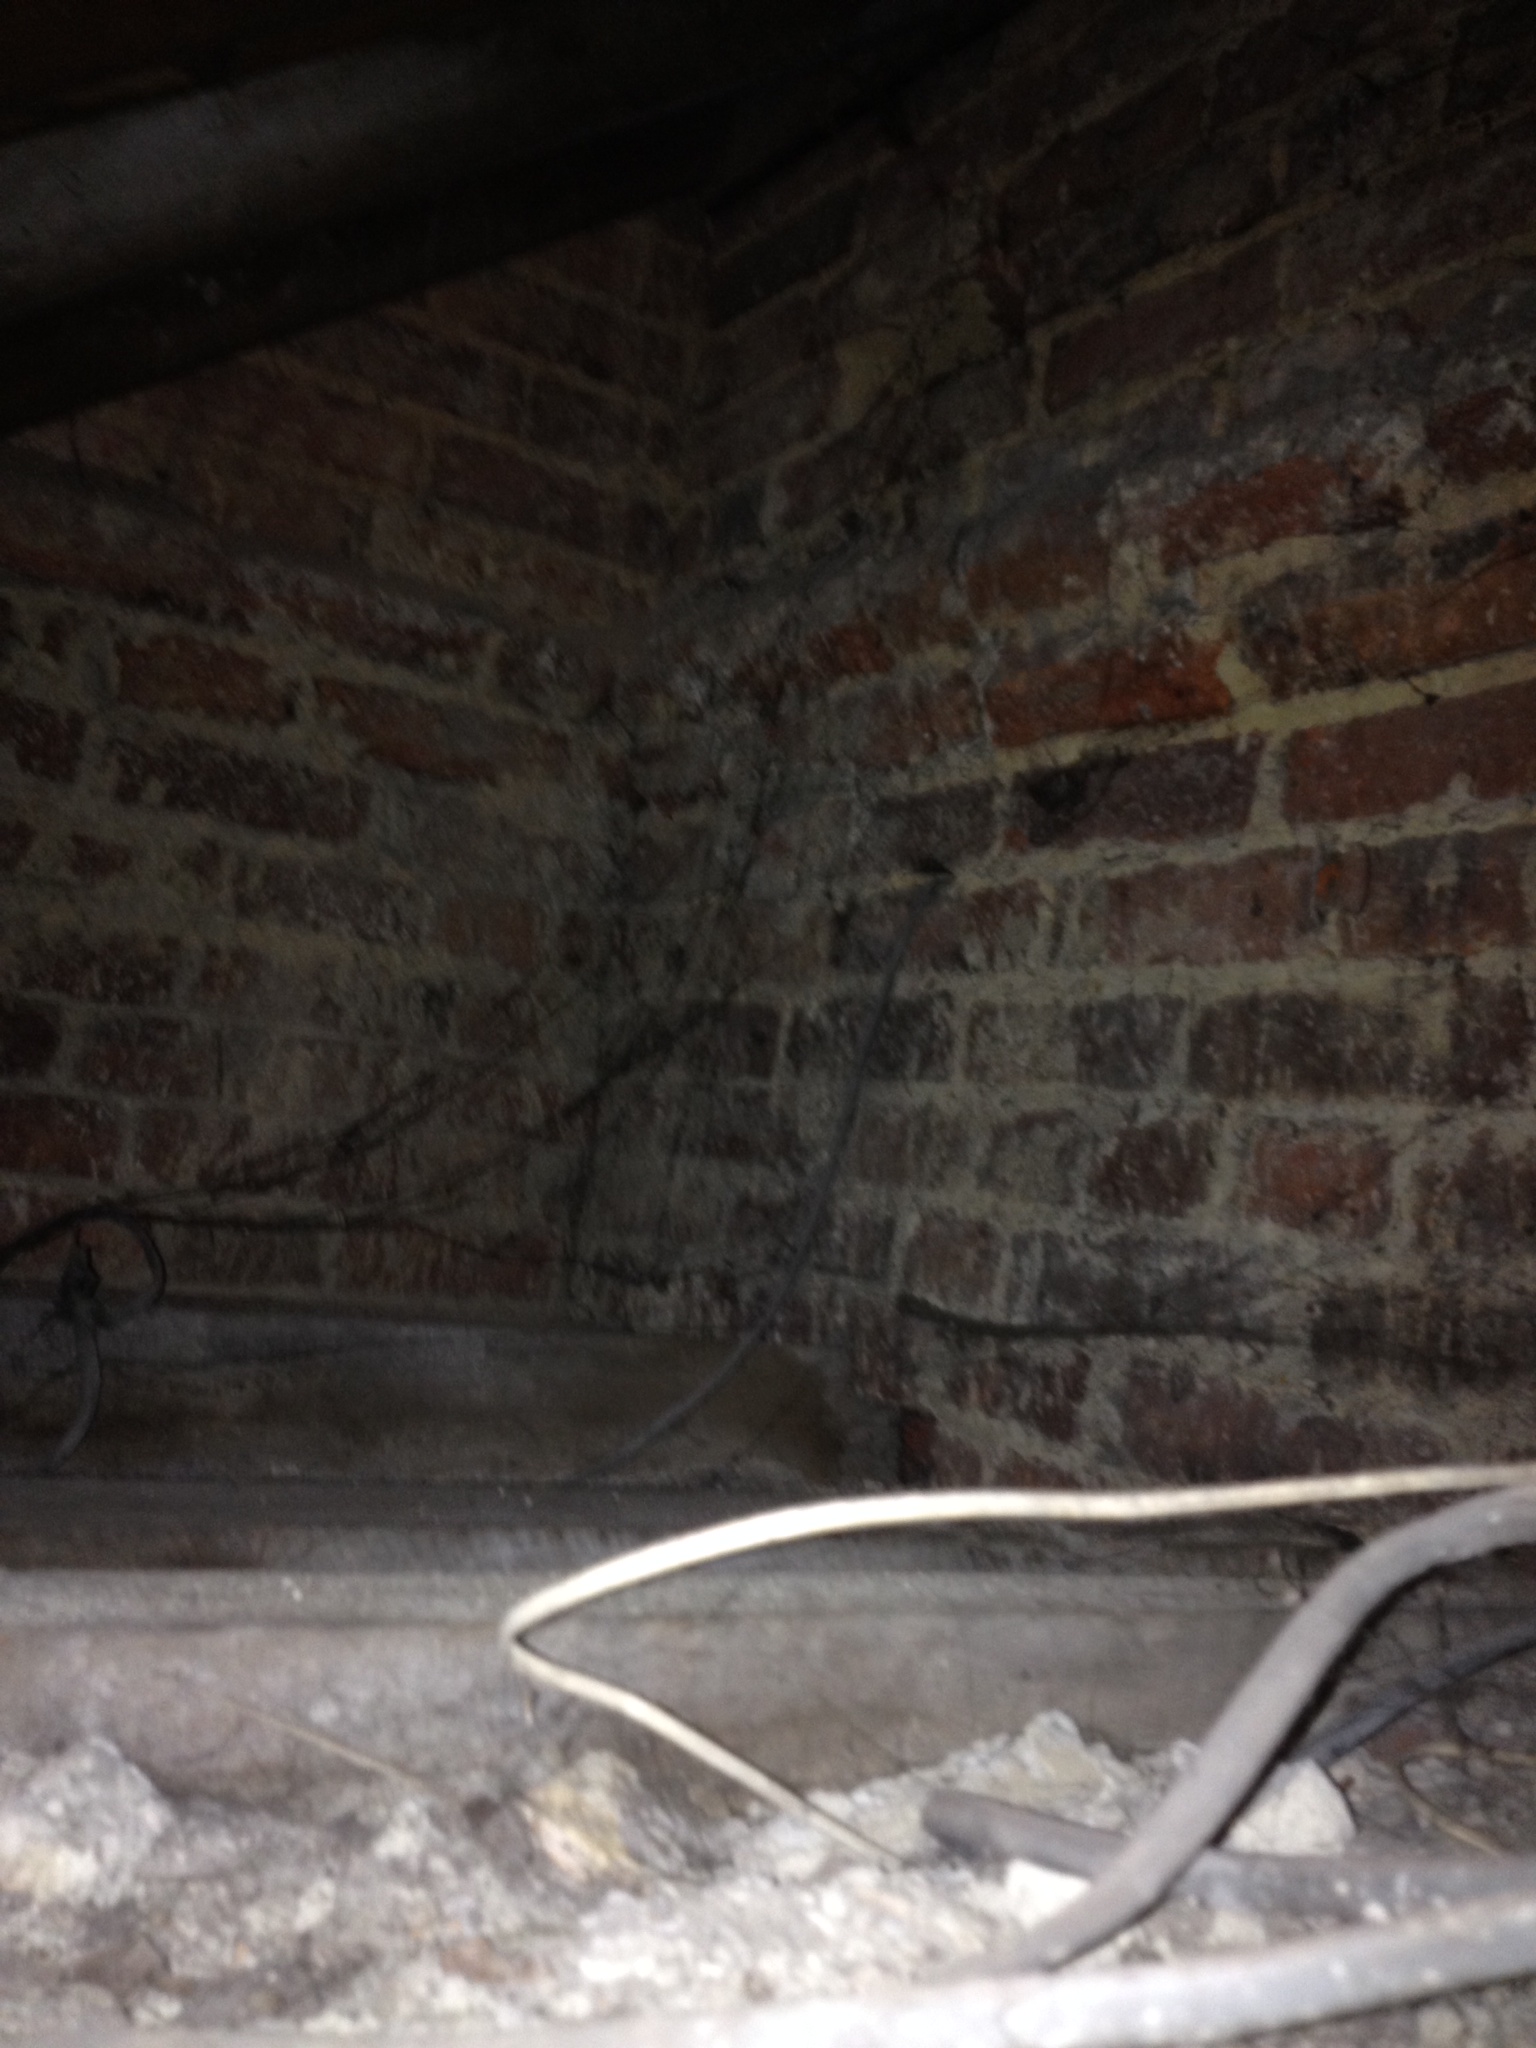
Technology at the time in 1911 was to build houses with solid (non-cavity) walls and Oakleigh is certainly no exception. This prevents a problem for rendered buildings with natural moisture becoming trapped in the walls and being unable to escape thus causing and or render problems allegedly.

I’ve discovered a good internet forum which I shall be looking to for matters of advise and discussion over at: http://www.periodproperty.co.uk/forum/index.php

Turn of the century solid wall properties evidently present somewhat of a quandary since some were supposedly designed to take a cement based render whereas other and all earlier buildings would require a breathable ‘lime’ based render.

In true ‘Homes under the Hammer Style’ – lets call in the experts…

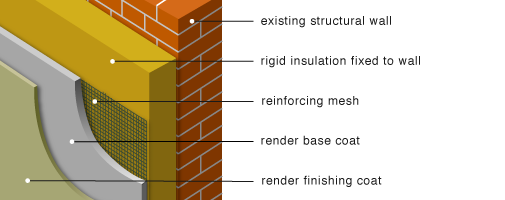
Google had yielded the existance to me of ‘Insulated Render’.

Insulated Render

This seems on paper like a reasonable solution for a number of reasons. The various layers are designed to prevent any water ingress hence removing the problem of internal damp. It’s also a neat way to dramatically increase the u value of our walls and to hence potentially lower our heating bills.

So – the first folk we got round were insulated render specialists. “Insulated render is exactly what you need Sir, nothing else will work… It will cure all your problems” went the sales pitch. Sadly with the ensuing quote, the company was also trying to clear third world debt or double it depending on which side of the fence you’re looking. Suffice to say, we won’t be going the insulated render route. A consideration of an insulated solution is that the insulation adds 150mm thickness to the walls. For us, this which would also mean having to faff around with the windows, cills, corbels, bits of the roof – so even cost aside, I don think this would fly.

Next up, was the regular high street render company. “Oh no Sir, a regular cement based render is all you need. We use a waterproof and breathable additive which means you wont have any problems with damp…” went the sales pitch. The resultant quote was much more in line with our expectations.

But the good folk over at www.periodproperty.co.uk had been extolling the virtues of Lime, so the final expert in the line up so far was a lime render specialist.

“..Oh no sir, a cement render would never work. You will always have the same problem. You must have a lime finish..” went the sales pitch. I’m beginning to spot a theme here. That said, I was thoroughly impressed with the lime guy. He made several suggestions including removing the render from below our slate DPC to leave exposed brick to prevent any damp bridging across it. I was also interested to learn that like a cement based render, lime can also be roughcast or smooth. His quote came in around 20% more than the cement guys, so I think is probably our favourite candidate at the moment.

More I’m sure will follow in the coming months..

Spot the Difference..

Before:

Before

After:

After


No – I understand that this may seem like a bit of a theme, but we really don’t have anything against trees! We did, however, have a particularly large False Acacia in the front garden which was ill-placed and dieing.

When we originally purchased the house, I thought it might be a good idea to look at doing something with the tree, but living in a conservation area, all the trees are protected so I was doubtful we’d actually be allowed to do anything. However, over the summer, it became more and more apparent that the tree was unwell as it began to drop larger and larger branches at random.

I got in touch with our local tree officer who was excellent. Having inspected the tree, Havering confirmed it was potentially dangerous and should be removed. Another irreversible change made to Oakleigh.. still heading in the right direction I hope!


A hoRENDERous problem?

One issue with the house which was immediately apparent when we originally looked round it was that there was a problem with the external rendering. Knowing nothing at all about rendering, it came as quite a shock when the surveyor advised it all had to come off and be completely be redone since the previous owners had only had the house re-rendered themselves a few years prior. Evidently the wrong type of render had been applied. Indeed it’s questionable whether it was even render that was applied at all or if it was just wet sand!

Still, to our unknowledgable selves, this poses the fundamental question of what is the correct type of render? So much have we thought about and researched this question, I’m sure it will come up in future blog posts, so I shall just refer to it as the “R” question. It also opens up a whole different can of worms for us in thinking about the order in which we do various work that’s needed. The former garage which has been poorly converted into a study needs to be structurally changed and we’d quite like to do a small extension – both of which would make sense to complete before undertaking a re-rendering.

Even the “R” question aside, there’s one issue for debate.

The current finish on the house is a smooth render which has cracked and discoloured in places which leads me to yet a further question of does a smooth finished render ever look good for more than a year or so? ..and if we’re going to have to rerender the whole place, should we take this opportunity to perhaps opt for an alternative finish?

Trawling the interwebs, we came across this picture of Oakleigh from the 1970s:

Oakleigh in the 70s

..which clearly shows the house formerly had a smooth rendered finish, although whether this in-turn was also not the original finish, who knows.

I’m not convinced that removing the render and just leaving the house as brick is an option, so I think we’re faced with the following 3 options:

  1. Re-render with a smooth finish and hope it’s just a better job this time.
  2. Pebbledash and paint
  3. Roughcast of some form

In our street, there are 4 of our house. 2 Have been pebbledashed and painted, 1 has fancy roughcast.

I actually personally like the roughcast/painted pebbledash finish, but keeping the house smooth would seem to be more sympathetic maybe to it’s architecture?! Oh the decisions! Comments and suggestions most welcome!

Starting to get a handle on things..

So where to start.. that is the question that we’ve been pondering ever since moving in. For some inexplicable reason, I remembered a comment my dad made when we were originally looking round the house about the years and years of gloss paint on the internal woodwork and how would we ever get a decent finish. With this thought in mind, I spent a lazy afternoon researching door stripping techniques and options. Despite whiling away several hours which really should have been spent more productively, my attentions turned to the door furniture we have.

No point in sorting out the paintwork on the doors I thought, given the state of our current door handles. Thankfully, we still seem to have most of the (presumably) original door furniture, although it’s in many places a sorry state of affairs.

Every internal door we have has a rim lock on it. We have none of the keys. As you can see from the pictures, some have been painted over, others are just plain knackered and we even have a matching brass affair for the front room.

So -what to do about all this then. My investigations moved to whether paint could be stripped from rim locks (in a similar way to paint from doors) and whether keys could be made up. I stumbled across: http://www.restorationblacksmith.co.uk/.

After a few days of emailing Luke the proprietor, I boxed up all of our ironmongery and posted it up to Derbyshire. Evidently – the ‘restoration’ (not sure if I will regret that term in time to come) has begun.

So – what first? Electrics? Plumbing? Damp? The problems with the render? No.. Door Handles. The story begins.