It’ll be all white in the end..

So the weekend I had been dreading was finally upon us. Time to repaint the marshmallow room. First order of the day to remove the radiator.

The carpet will be replaced, but for some unknown reason, I felt compelled to do all that was possible to prevent any damage to it whilst removing the radiator. I’d had previous unfortunate experience of undoing radiator nuts in the past, so with the valve securely held in a spanner, I undid the right hand end and began the draining process. Thankfully the first side was uneventful.

Time to address the second. My previous radiator mishaps with valves had all centered around bending the feed pipe whilst trying to undo a stubborn radiator nut, hence I hoped holding the valve securely whilst undoing the radiator connection would prevent a recurrence. But there was a problem. The radiator connection wouldn’t budge. Copious amounts of WD40 later, I resorted to the Jeremy Clarkson approach of using something bigger. ‘Crack’, but sadly not the satisfying crack of the nut finally giving in and rotating, but somehow I had managed to pull the radiator off the wall. Now the entire weight was being carried by the central heating pipe feeding the stubborn valve. I had not foreseen this possibility.

To cut a long story only slightly shorter, I had the radiator propped up on wood, the stubborn valve finally undone and countless buckets of water filled from draining it. This was when I discovered one of the valves wouldn’t close fully. Despite having a reasonable arsenal of emergency supplies in my tool kit, this needed a trip to B&Q to get a blanking nut so I could actually stop the flow of water.

By the time I had returned, the radiator had, of course, completely refilled it’s self and I was back to square one. More buckets later, the rad was empty and the blanking nuts in place.

Radiator Off

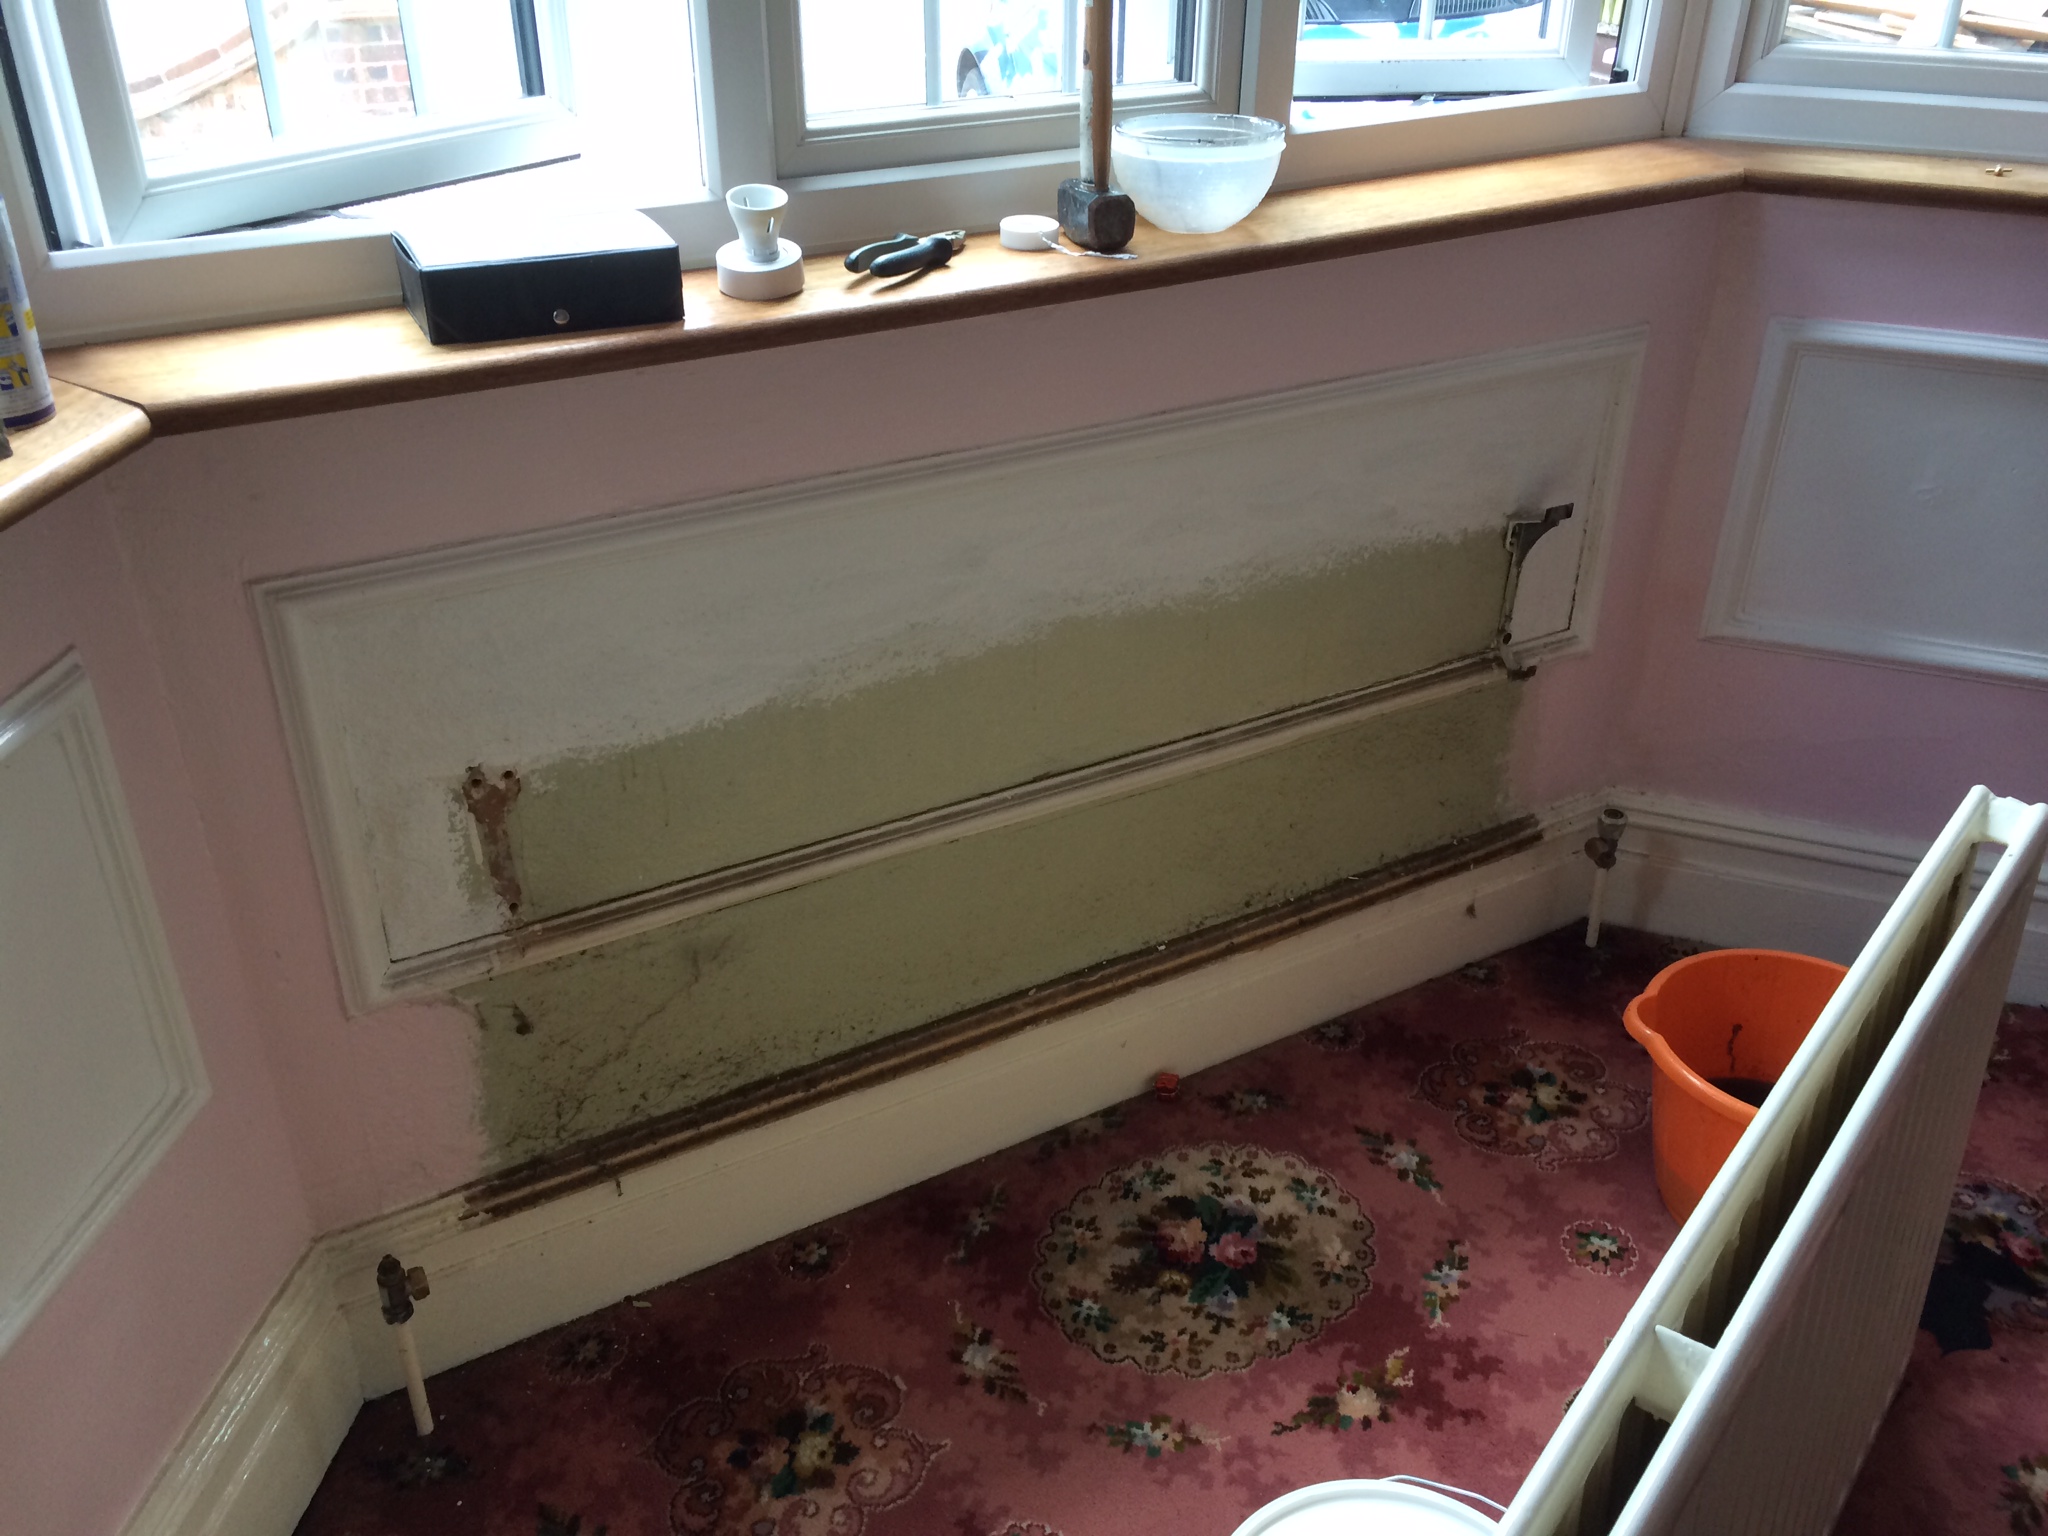
Time to get the radiator off the wall. It was far too heavy to lift on my own so I brought Lu in for some assistance. Sadly Lu hadn’t removed a radiator before and my instructions were probably vague, so suffice to say, we ended up with a molehill of thick black goo on the carpet. Oh well, at least the radiator was finally off!

And so the room was formerly green it would seem. Green with the panels painted, but the borders not. For a fleeting moment we considered maybe returning the room to green would be a good idea, but the day was fast running away and we’d already bought the paint.

Our original plan was somewhat optimistically to have the whole room painted in a weekend. 2 coats of undercoat on the Saturday, and 2 topcoats on Sunday with the woodwork somehow fitted in around was the plan. Oh how wrong could I have been.

WhiteBayThe problem with painting the room was it was just too big to use a brush, yet the detailing meant it was impossible to roller. Also, the previous people had used a very shiny emulsion (looked like gloss to me) for the walls and gloss on the panneling.

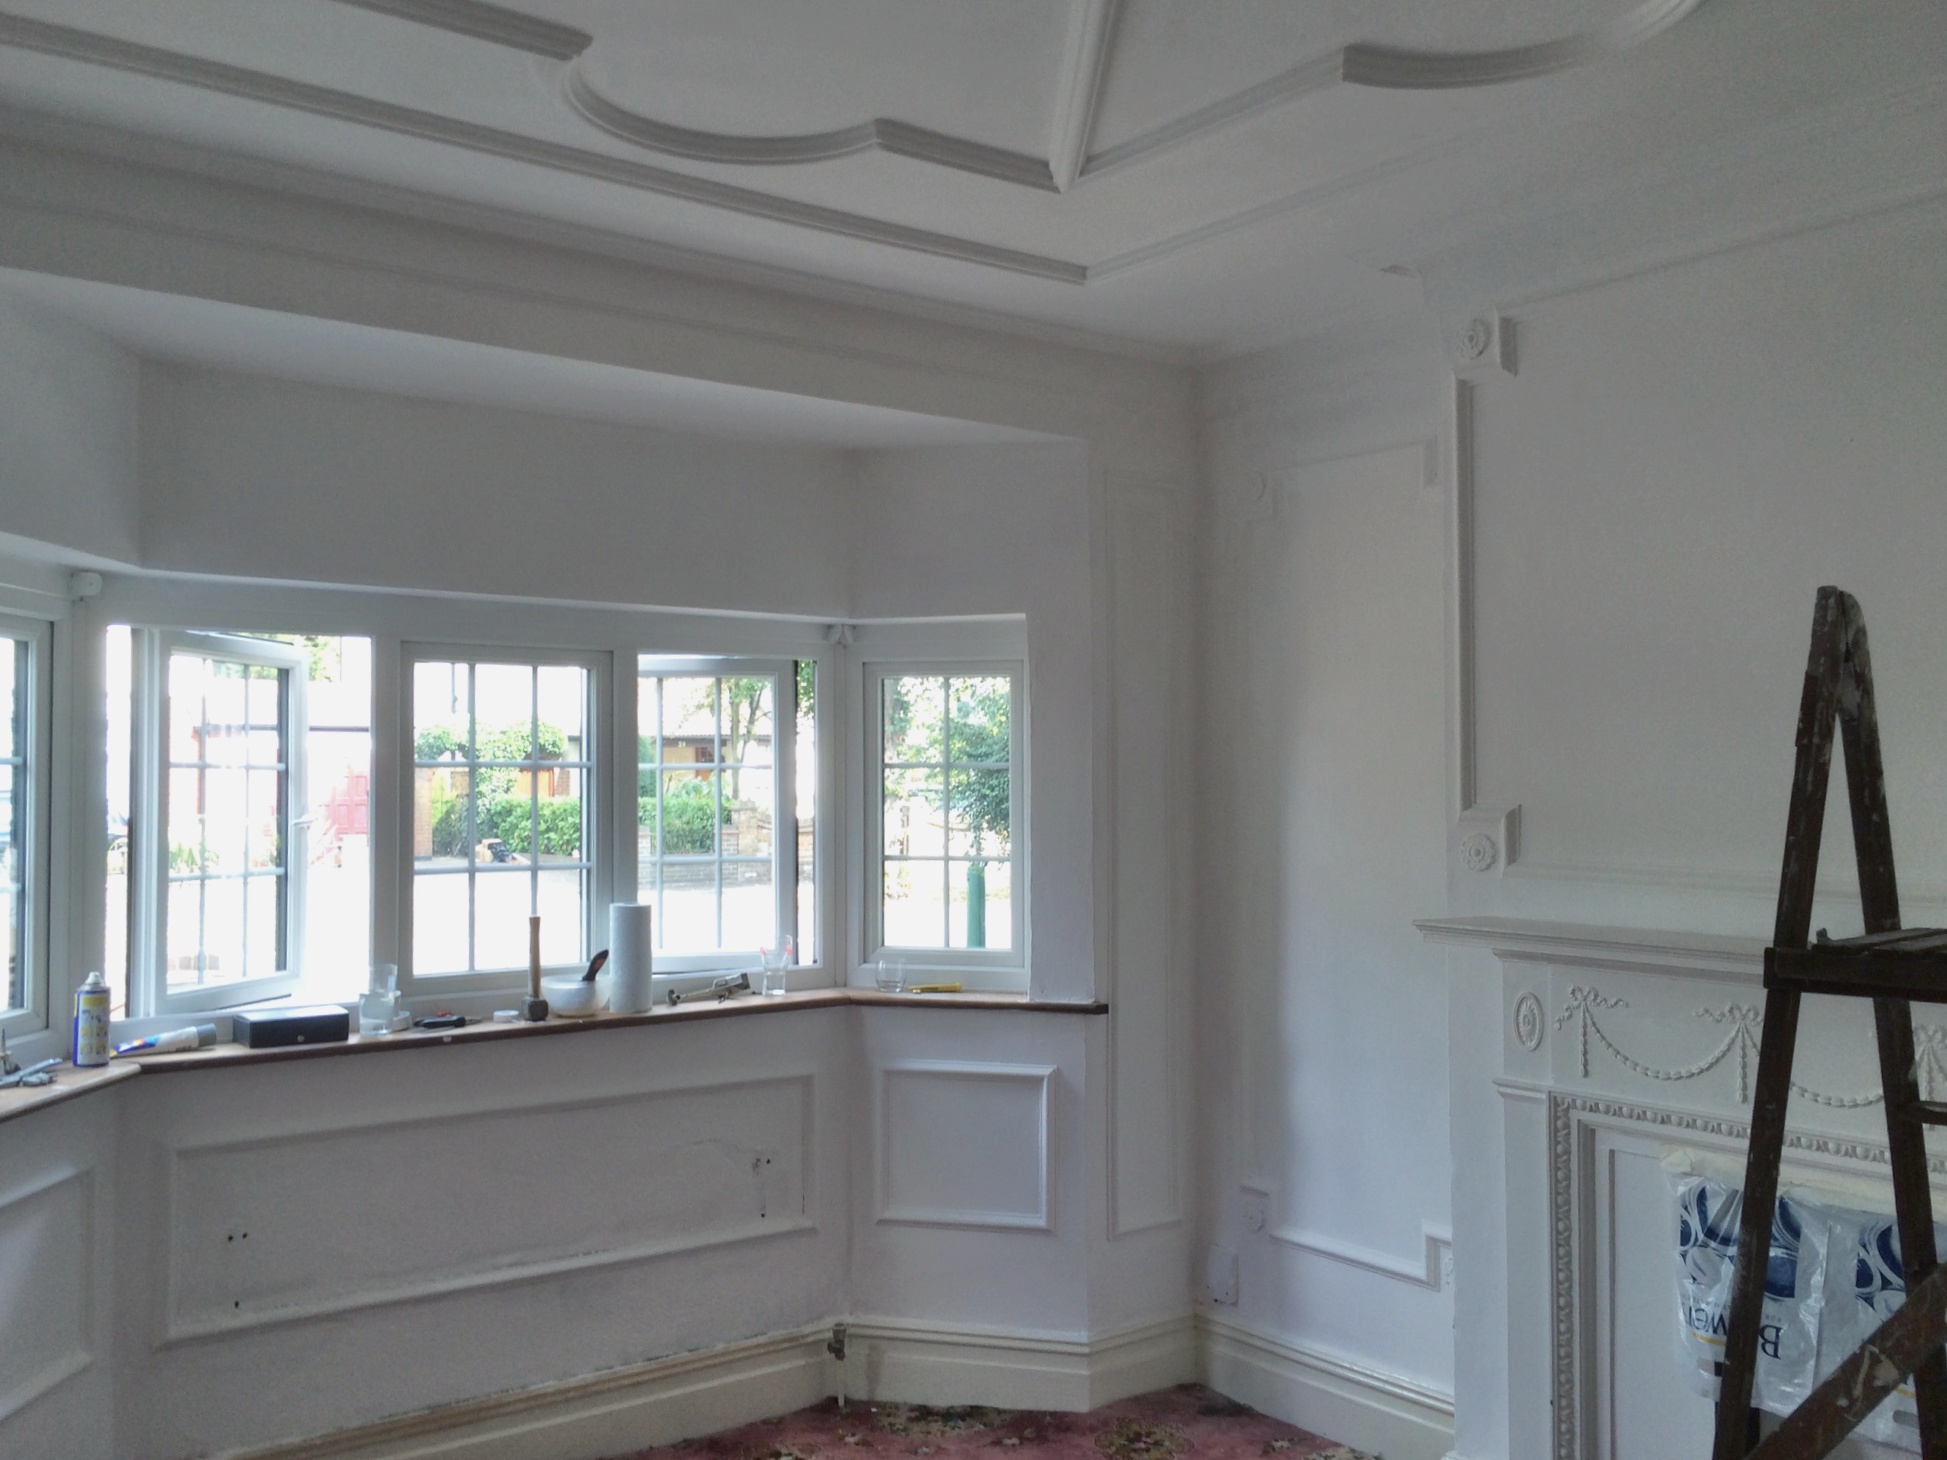
Painting just seemed to drag and drag on. Coat after coat, the pink still grinned through. 9 Hours later we had finally finished the first undercoat and the pink was just a fading memory.

Whilst we were sorting out the marshmallow room, the bathroom guy was busy skimming the walls of the bathroom. What paint are you going to use? he asked. Farrow and Ball we replied which launched him into an unending diatribe about the virtues of using cheap leyland paint instead with their colour match service. He reminded me, unfortunately, how watery and thin F&B paint can be which brought back nightmare memories of the last time I’d used the paint at a previous house. Painting water on the walls I seem to recall would have been easier. Still, for the undercoat, and the ceiling, I just needed a standard matt white emulsion and set off to by my usual reliable Dulux affair. It so transpired that Screwfix happened to have a 15% off weekend on Leyland paint, so at just £14 to a 10 litre tub of contract matt white, I thought, what the heck, I’d give it a go.

White WallI have to say, in the end, I’d thoroughly recommend the Leyland paint. A lovely consistency covered the shiny paint with relative ease leaving a super matt flat finish. I’ll definitely be using Leyland again I think for white..

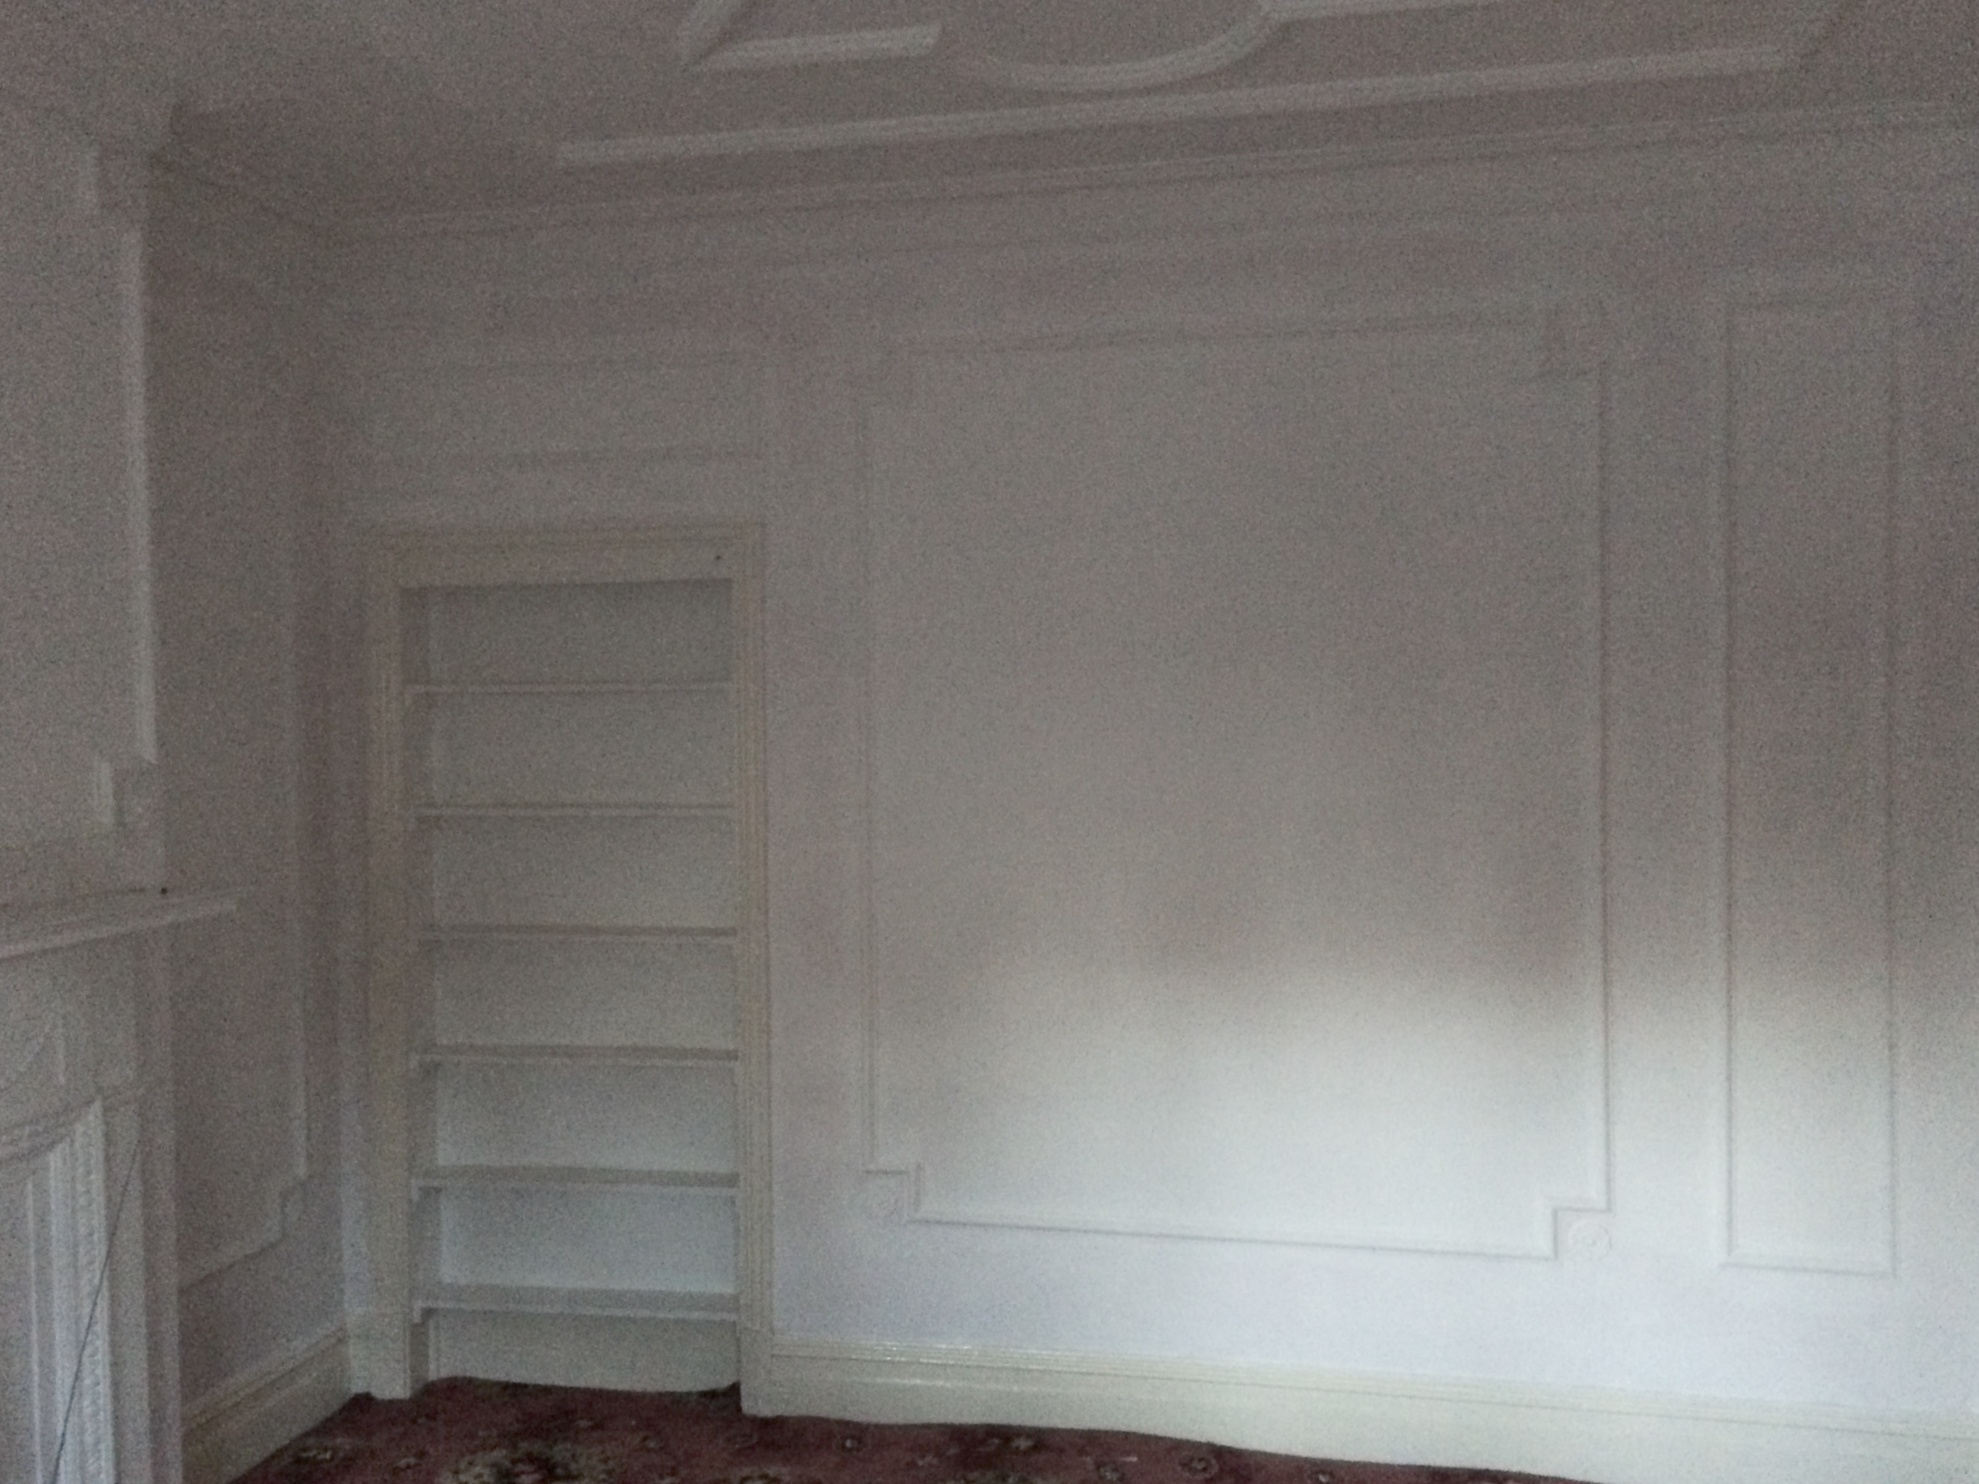
In the end, with the light fading, we’d managed 1 full white coat on all the walls and 2 on the ceiling. Another 1 maybe 2 would be required for the ceiling and at least another base coat for the walls. Finishing by Sunday night was never going to be achievable..

A Less Shocking Headline (Hopefully)

Spot the difference..

Fuse Box

New-CU


Not too difficult I guess. Whilst there were new electrics going into the bathroom for underfloor heating, heated towel rail etc, it seemed like a prudent time to uprate fuse box with a new safer consumer unit.

Now for bonus points, spot the problem with the picture of the new. Did you get it? Downstairs lighting now isn’t working. The Heath Robinson affair of wiring through the bell transformer under the stairs has also been disconnected. Sadly that wasn’t the cause of the woes and despite a day of fault finding, we’ve been left without lights downstairs whilst the electrician ponders why the circuit keeps tripping out. Most likely suspect is a Neutral-Earth fault it would seem, but every light fitting and switch has been off and tested with no obvious fault found. I get the impression this is going to be a longer (more expensive) job that anticipated.. -gulp-..

The keen eyed will also spot the mysterious trailing wire to the left of the cupboard. This was previously connected to it’s own little fuse unit, but no, we’ve no idea what it was for either!

Bathroom – Day 4

Back in Blighty now and everything has arrived for the Bathroom. We’ve completely lost the use of the hall now with all the stuff heaped up. Can’t wait for the weekend when we have to move it all upstairs!

Bathroom in Hall

Bathroom in Hall

One of the challenges we have with the new bathroom layout is how to heat it. We previously had a white ladder rail plumbed into the central heating, which was great in the winter, but meant we had no way of drying towels in the summer.

With part tiled walls going in with a bevelled border, I wasn’t convinced a new full height ladder rail would work as it would have to bridge the tiled and non-tiled part of the wall. We’re also quite tight for space in the bathroom, so I set about the task of finding a slimline, dual-fuel (plumbed/electric), towel rail, ideally of a period design. This proved to be much more of a challenge than I anticipated.  It’s easy enough to get hold of a new half-height ladder rail that can be plumbed in as well as having an electric element, but ideally, we wanted something with a bit more of a period feel.

The first part of the challenge was just trying to find a period radiator that was slim enough to fit. Ideally it had to protrude no more than 15cm from the wall. For some reason, the vast majority of ‘classic’ towel radiators seem to have a deep towel hanging rail at the top taking them to around 25cm in depth at the top. That just wouldn’t work for us. A google for “Slimline Period Towel Radiator” started to yield more positive results with various options coming in, but none seemed to be dual-fuel. Plenty of plumbed in options available as well as some extremely expensive electric only.

Geyser Radiator

Mastering the google search, a few options popped up, but we were looking at serious money. £500+ for a radiator!! Finally, I came across www.geyser.co.uk who seemed to offer nearly all of their radiators in plumbed-only, electric-only or dual-fuel!

With a reasonable price tag and next day delivery it all seemed too good to be true! I ordered and true to their word, the next day it turned up and can be seen among the bathroom paraphernalia in the photo above.

It’s obviously not connected yet, but I have to say we’re really pleased with it having unpacked it. Looks to be well made with the heating element in an eminently sensible place. The proof will be in the pudding once it’s finally installed and connected up, but for service and product range – Geyser certainly seem to be worth a look!

Marshmallow Room

I’m off in Germany with work at the moment, but received the below picture from my wife.

Paint Options

Looks like we’ll be painting on the weekend!
I’d also pinged the periodproperty forum for some hope of inspiration as to how to tackle painting the panels previously. Helpful as some of the suggestions were, the majority of the comments ended up being focussed on what the previous folk were thinking with the pink. The Barbara Streissland room, or my personal favourite, which this room will now be forever known as: “The Marshmallow Room”.

Anyway – Lu found this pic on the internet, which we both seemed to agree was a good balance of period vs modern..

Inspiration

…so I think that’s what we’ll go for. F&B and Little Greene paint ordered, I can hardly wait till saturday. Do I sound convincing? 🙂

Bathroom – Day 2

Day 2 and the bathroom guy is having trouble with the floor. It slopes a lot evidently and it’s obviously causing more problems that he’d originally envisaged. I’m beginning to wonder how the original estimate will actually shape up vs. the eventual bill!

Slopey Floor

Im also slightly worried, being abroad currently, about the above photo showing work thus far. Slightly concerned there’s nothing holding up the right hand side of the floor and the lathe and plaster wall. Will have to call the Bathroom guy tomorrow methinks..

Bathroom – Day 1.

So, the bathroom fitter came round today and started removing the last of the tiles and suite I’d given up on. By the end of day 1 most, but not all of the tiles were off and the suite was out. I took some solace at least that even a professional with power tools had been defeated after a day’s hard labour. Looks like someone welded the tiles in the shower to some form of waterproof board as they were just not coming off. Rather him than I!

Bathroom - Day 1 Bathroom Day 1 - Shower End

T Day

T-Day. We’ve finally agreed on the silver travertine as the safest option. Shower and floor tiles to order. Back to the grey sandstone shop and a quick double check of their display before ordering. No. nonononono. We’ve gone off them. After weeks of deliberation, we’ve gone for the victorian effect in a split second decision. At least that’s one decision made!

The bathroom fitter is due on Monday and having broken down the quote into every conceivable stage, there’s an opportunity to save some money by taking the old suite and tiles out ourselves. How hard can it be?!

..very as it transpires. Especially in this crazy heat. Bath pannel off, disappointing to find that nobody had thought to fit shutoff valves to the bath taps. A job for later.

Bath Panel Off

The sink came out without too much drama, but then it was onto the toilet. Cistern, relatively straight-forward, but the pan!?!? oh my!! I’d swear someone had superglued the screws in place. Drenched in sweat and after some choice words, I’d managed to get 3 of the 4 screws securing the pan in place out. 1 to go, but CRACK!! The pan was suddenly free. In 2 pieces. Oh well, there go my plans to ebay it, but at least it’s out!

No Loo No Sink

Flowers now in the garden where they most definitely belong.

Flowers in the Garden

Removing the tiles with a hammer and bolster proved much more challenging than I’d envisaged. With tiny shards of razor sharp tile fragments flying all around and clumps of horse hair plaster coming off, I finally admitted defeat. Not an impossible task, but just one that was going to take much longer than I’d envisaged and not one that was really practical to complete in the heat. Looks like we’ll be paying the bathroom guy to clear the rest out afterall.

Not Much Removed

How Shower Tile it?

Whilst the tile debate rages, I had a sudden worry about how the shower area should be tiled. I seem to recall the guy who fitted our bathroom in the last house advised that tiles inside the shower should overlap the shower screen. But how would this work with our bevelled border tile we’d chosen?


Shower Tiles Beyond Shower Screen

Shower Tiles Beyond Shower Screen

As we had the world last remaining stocks of our wall and border tile an alternative option would be to continue them through the shower and just put a different tile above the border. But concerns about the border tile crept into my mind again as I wondered how the shower frame might work across the bevel.

A quick diagram was called for.. One to email to the tiler for some input I think. Surely other folk in the world must have had a bevelled tile and a shower screen?!

Whats the right way to solve this tiling conundrum?

Whats the right way to solve this tiling conundrum?

Taking a Loo Break..

Wow.. I’ve just realised how long it’s been since I updated the blog. To be fair, not a great deal of interest has been happening. But..

We’ve finally reached the end of our tether with the bathroom. Having spent an hour with bleach and a toothbrush trying to clean around the shower, I’ve admitted defeat. No matter what we do, we just can’t make the tired and badly fitted bathroom look clean. Replacing the bathroom was always on our list of things to do, but it’s time to reprioritise.

Choosing a white suite proved not to be too controversial, but why is choosing tiles such a nightmare. Or is it just me?

A whole weekend suddenly evaporated having wandered from tile shop to tile shop trying to find something we agreed on. “Too old fashioned”, “Too Modern”, “Too Spanish Hotel Bathroom”..

Perusing through bathroom catalogues, we’d found a ‘wood panel’ effect tile we both really liked.

Imperial Bathrooms Edwardian Wall Tile

Imperial Bathrooms Edwardian Wall Tile

Well, everything about it apart from the price. Fortunately, B&Q had something similar enough in our eyes, but less fortunately it was being discontinued and the local store didn’t quite have enough in. Beckton we were told had a good quantity in, so off we headed. Someone wasn’t smiling on us, as after we’d parked the car and began walking towards the store entrance, we passed another customer loading a full trolly load of the exact tiles we’d come for into their van. To cut a long story short, after visiting what felt like every B&Q in the south east, we finally had enough wall tiles to go around the room.

But that was only a small part of the problem solved. With the wall tiles sorted, we still needed someting for the floor and for the shower. Our local tile superstore had a natural sandstone brick tile in which was ideal for the walls, so we ordered those and thought it was just the floor to solve. As we were leaving the carpark, the store assistance came running over to tell us that sadly those tiles too had been discontinued and they couldn’t get enough in from local stock for us. Would we like a grey sandstone instead? It wasn’t our first choice, so we agreed to sleep on it whilst we thought further about the floor options.

Next door was a local branch of Topps who happened to have in a “Silver Travertine” that looked like it would ideally match the grey sandstone for the shower. Just as the decision should have been made, we noticed a traditional victorian effect tile which caught our eye. Having not been able to agree in the shop, we brought home a sample of each to argue over in the privacy of our own home.

So here we have the 2 options..

Bathroom Floor Tile Options

Bathroom Floor Tile Options

..the safe option (grey travertine) or the outside contender. Struggling to decide, we opened the debate up to the folk over at the period property forum.

Approved!

It’s been a long wait and indeed it’s come right down to the allowable council deadline, but we’ve been given the go ahead. Planning has been approved! Celebrations all round. It’s conditional upon us getting the building materials (bricks / tiles / render / windows) approved, but fundamentally we can move on to the next stage – building regulations. Doubtless more obscene sums of money to be shelled out but it’s all begin to feel a bit more real at last!